Tag Archives: Section 7

Rudder – Bonding Straps

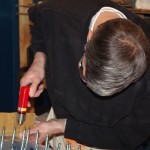
Eric and I disassembled the rudder today.  First up was deburr everything and dimple the skins.  After this I went ahead with measuring and drilling the attachment points for the bonding straps on both the vertical stabilizer and rudder spars.  The process was the same described in earlier posts for the static wicks.
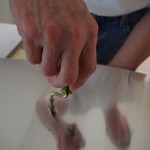
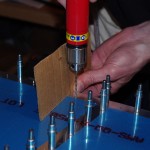
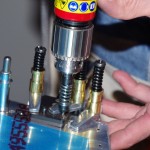
IMGP3728The swivel handle with a #40 countersink bit attached goes much faster and just as cleanly as twirling with my fingers.  It is also much easier on hands and forearms. We dimpled both rudder skins after this step.
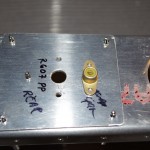


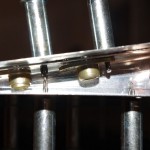
IMGP3742This is a mock-up of how the nut plate for the bonding strap will look on the backside of the rudder.
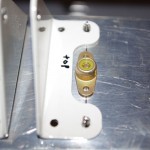


IMGP3741I wanted the bonding strap in the middle hinge location of the vertical stabilizer, close to the upper bracket of the pair – and horizontally aligned with its opposite partner on the rudder. This mock-up shows how close to the bracket I was able to place the nut plate.  The horizontal alignment also turned out near perfect.
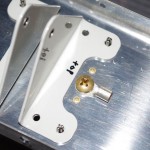


IMGP3745This is how the final configuration should look.  The nut plate jig works great!  After so much time doing research and thinking about how to make these modifications, I am very pleased with the outcome.


Rudder – Static Wicks

I performed my first modification to the plans today by drilling attachment holes for the static wicks. Based on the manufacturer suggestions , they should be placed on the outer edges and most rear portions of the plane to properly dissipate an electrical charge. Using a pair about 12 inches apart is also recommended. The rudder on the RV10 has two rib stiffeners at the top almost exactly configured for this application.

The modification requires measuring, drilling and countersinking holes for nut plates to secure the static wicks.  There are special jigs available for different sized screws, so I bought one (~$35) for 10# screws to fit the Dayton Gardner 16165 wicks.  Because the skin and stiffener on the rudder are only a combined .050″ thick, I started the main hole with a #40 drill, then progressively got bigger (#30, #21, #17, #12, #10) until the final hole diameter was reached.  This was a bit tedious, but kept the thin skins from bending or tearing. The jig then is used to exactly align the attachment rivet holes.  Since holding the wick in place is not considered structural, an ‘oops’ rivet with a smaller than normal manufactured head will be used to keep the countersink small and shallow (more on ‘oops’ rivets in later posts).

The hardware list for the static wicks and bond straps:
MS21078-3 two lug elastic insert anchor nut
MS21080-3 one lug elastic insert anchor nut
MS35207 machine screws (various lengths will be used)

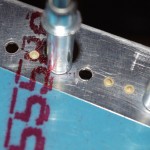
IMGP3705Here using the #10 nut plate jig to position the rivet holes relative to the main screw holes. The jig essentially provides a perfect fit every time. I cannot imagine spacing the three holes properly without that tool.


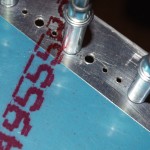
IMGP3706Final drilled holes for the nut plates with plastic inserts.  Notice the three hole design on the left compared to the single lobe method on the right.


IMGP3716This picture shows the decreasing headroom moving r-l towards the trailing edge. Notice why the use to the one lug anchor plate is needed here.


IMGP3727The attached holes have been hand countersunk with an ‘oops’ rivet head used to check depth. This picture shows approximately how it will look when the final riveting is completed.


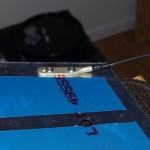
IMGP3714Dry fit of the Dayton Gardner static wick on the uppermost rudder rib. The result looks good.

Rudder Drilling – Part 2

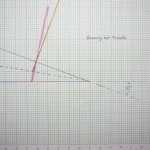
Used a chart and homemade guide to get the necessary 5 degree angle to drill perpendicular to the chord line as per instructions.

IMGP3685A rough drawing of the trailing edge configuration.


IMGP3687Home drill guide in operation.


IMGP3688Drilling in progress.


IMGP3689This close-up shows the trimmed trailing edge.  A bit more rounding is needed to smooth the AEX piece.  I intend using ProSeal (or equivalent) on the trailing edge, so hopefully some of the empty space will get filled with this material.

Rudder Drilling – Part 1a

The last few days I have been researching how to drill and countersink the rudder trailing edge.  By hand measuring the AEX aluminum strip I determined the acute angle to be about 10-to-12 degrees.  If the common drilled hole through both sides is perpendicular to the chord, this means the countersinking bit will be about 6 degrees off the drilled line when removing material to accept the skin dimples. This angular difference does not seem like much, but we shall see how it goes.

I have also spent quite some time finalizing the bonding strap and static wick configurations.  Using #10 screws, nut plates, and a 3/8″ braided copper mesh should do the trick for effective electrical connectivity.  My intention is utilize the open area near the middle hinge for the bonding strap.  Parts were ordered and have arrived from Aircraft Spruce.

MISC LOGISTICS – continue to acquire painting supplies and work on the configuration of the shed for alodine/prime processes.  I have my eye on a 7.2CFM, 2HP air compressor, but need our finances to stabilize a bit before pulling the trigger.

Rudder Drilling – Part 1

Eric helped match drill all the rudder skin holes common to the spar and stiffeners.  I do not understand the instructions drilling the trailing edge. In one step the plans call for drilling perpendicular to the chord of the rudder, later it talks about countersinking holes perpendicular to the trailing edge surface.  Right now these seem like contradictory instructions.  I will need to get some clarification before proceeding.