Category Archives: Section 10, Tailcone

Tailcone Assembly (3)

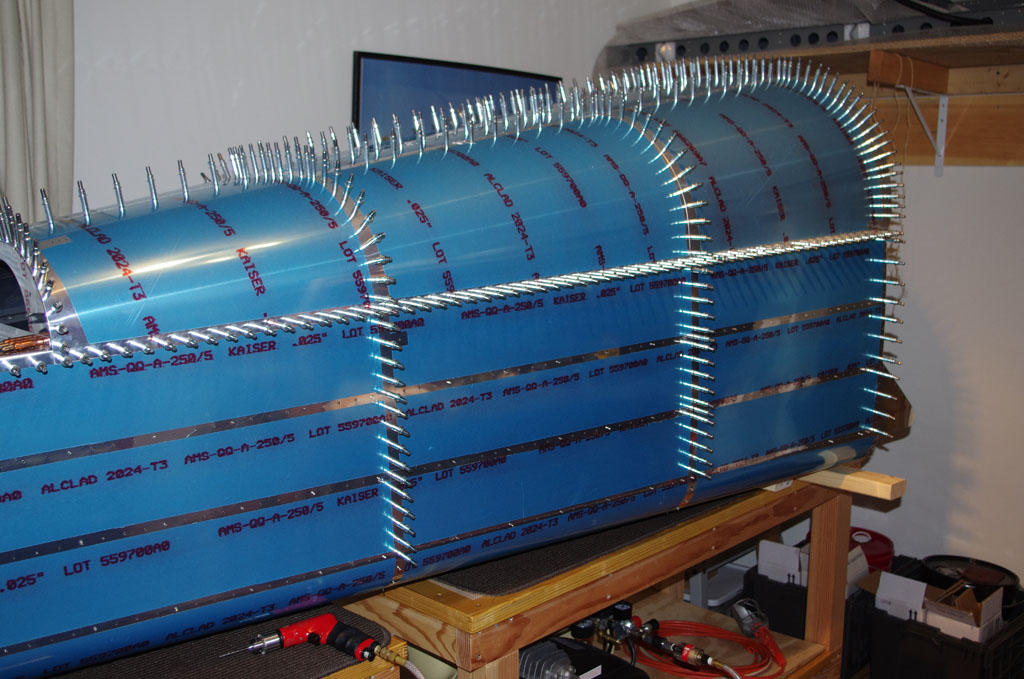
Over the weekend Eric and I finished off riveting the tailcone side skins, frames, stiffeners, and lower pans together.

IMGP5357
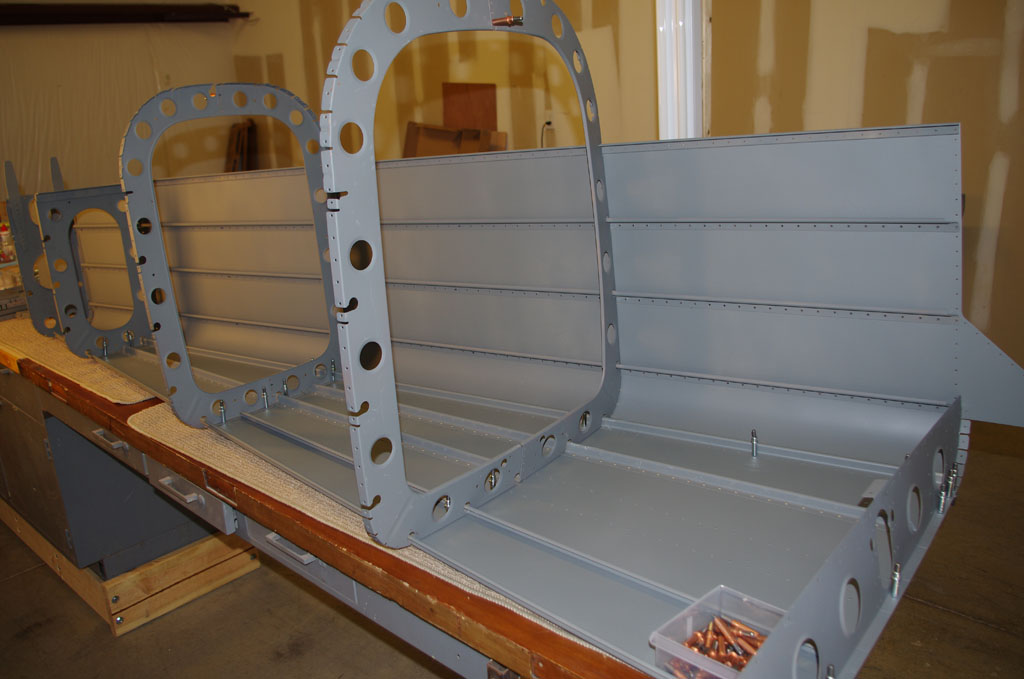
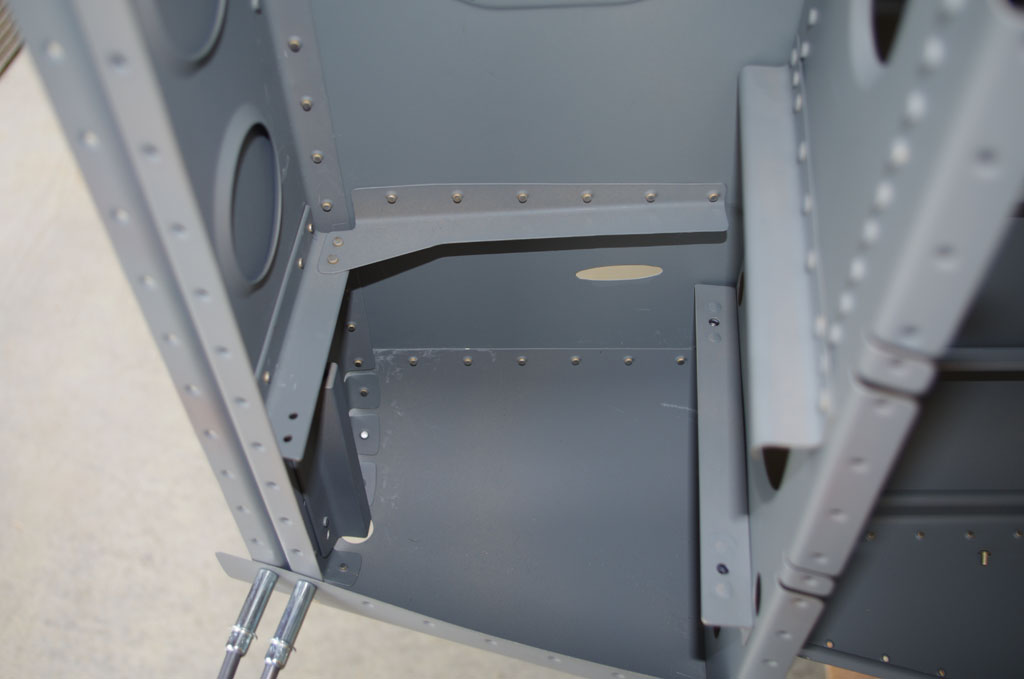
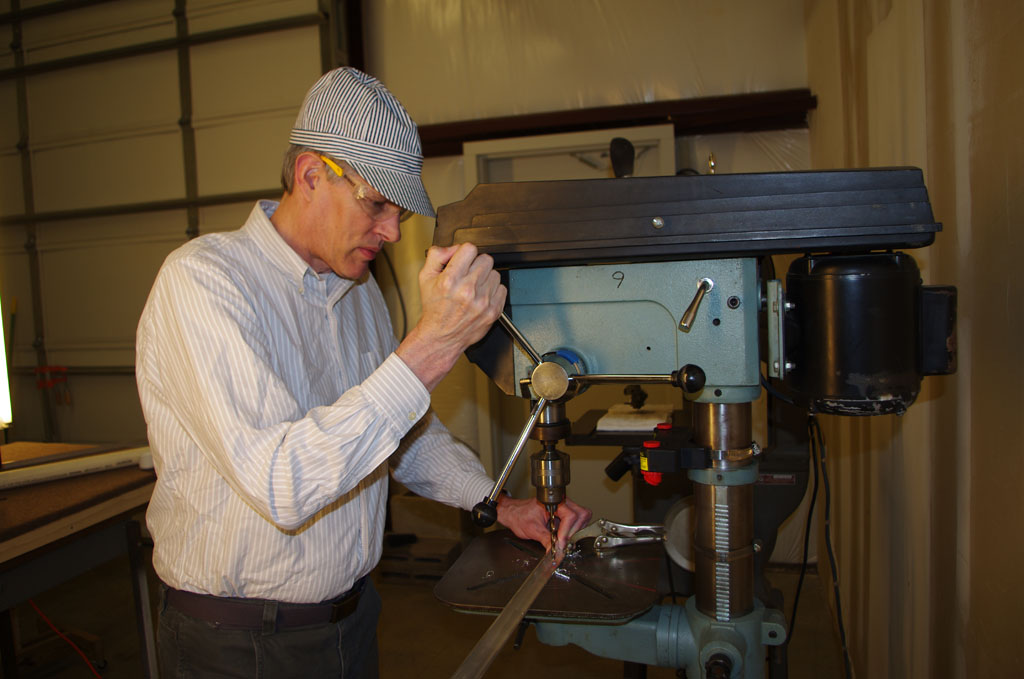
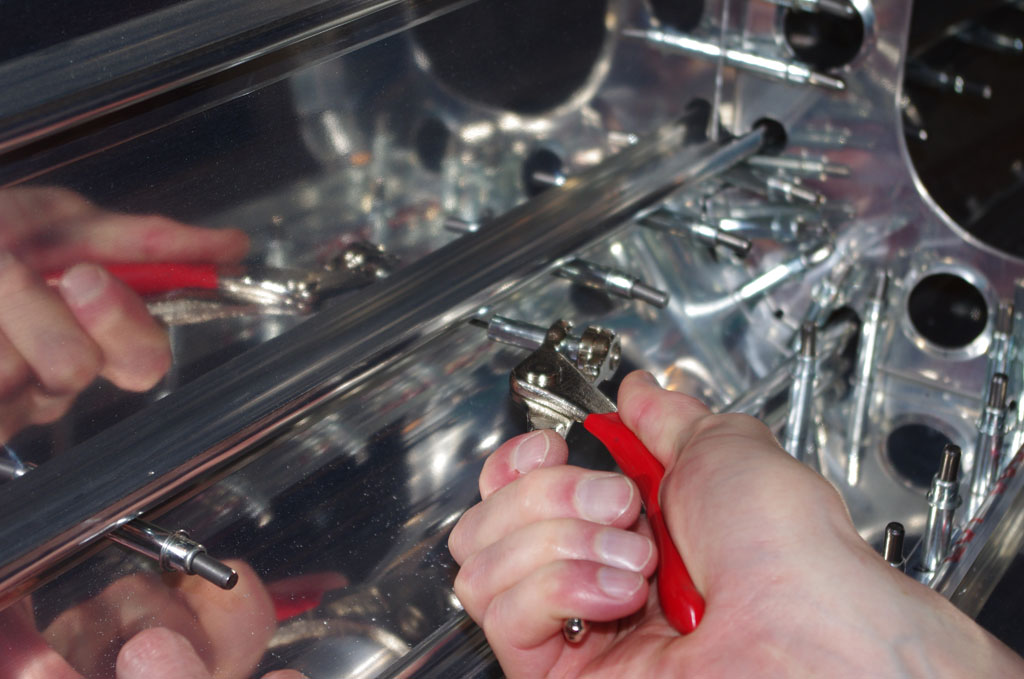
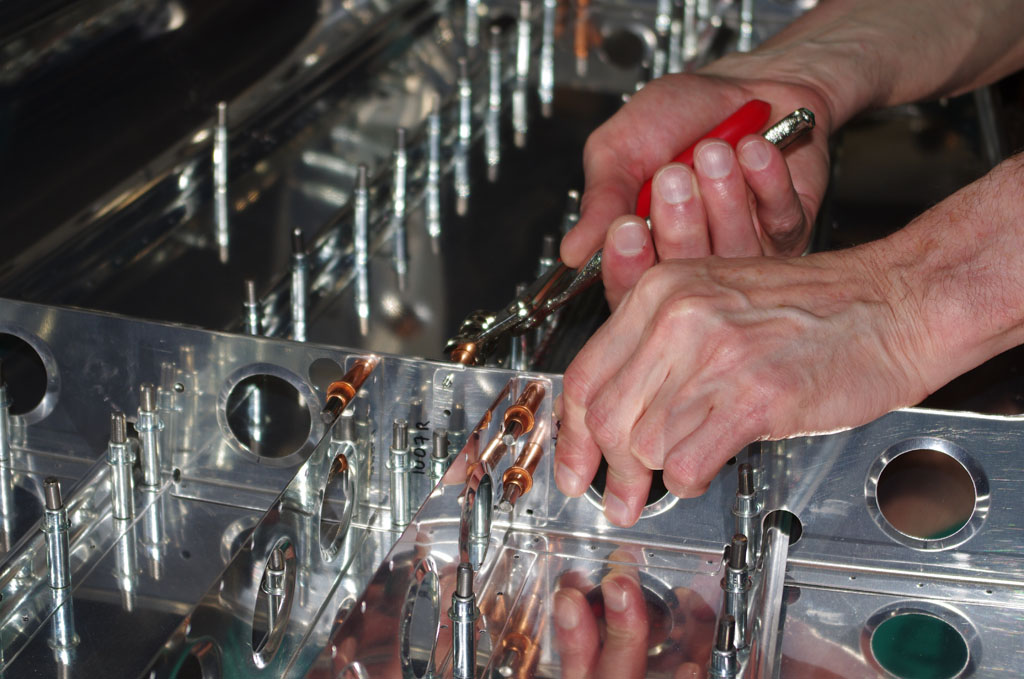
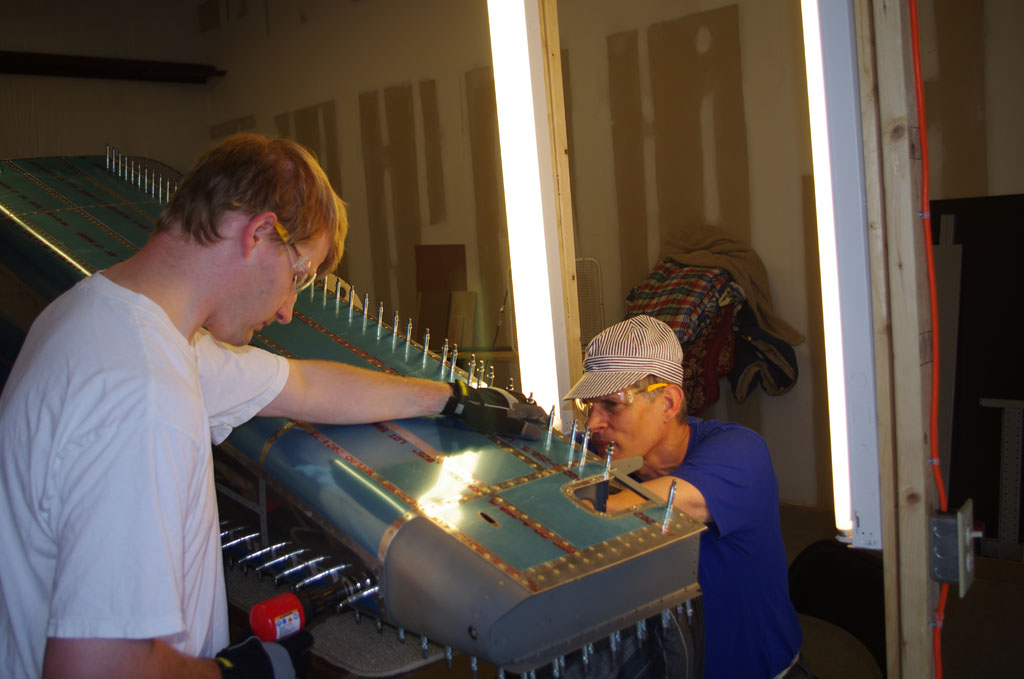
First order of business was the rearmost tail section.  With both left and right skins attached, space for bucking rivets is greatly reduce, thus requiring bodily gyrations to get a clear view of the rivet head and bucking bar.


IMGP5360
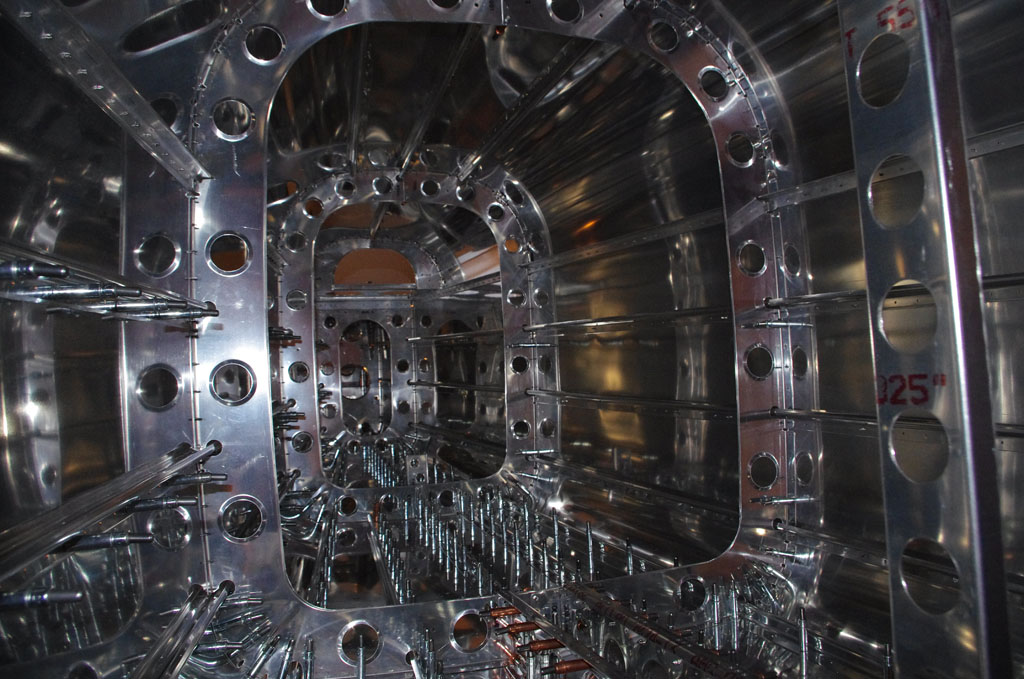
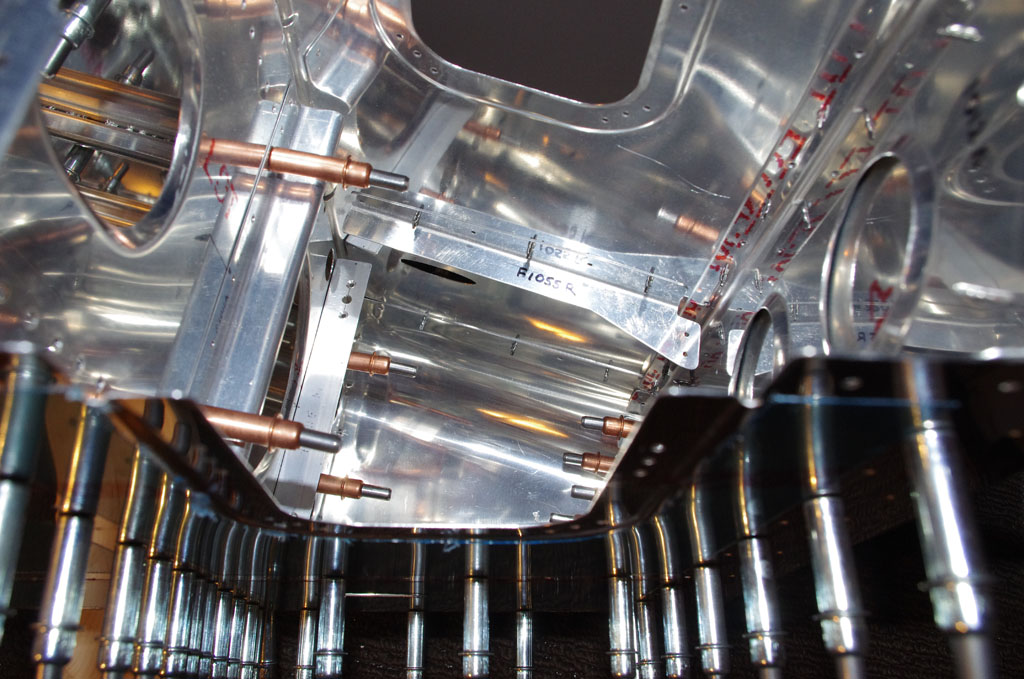
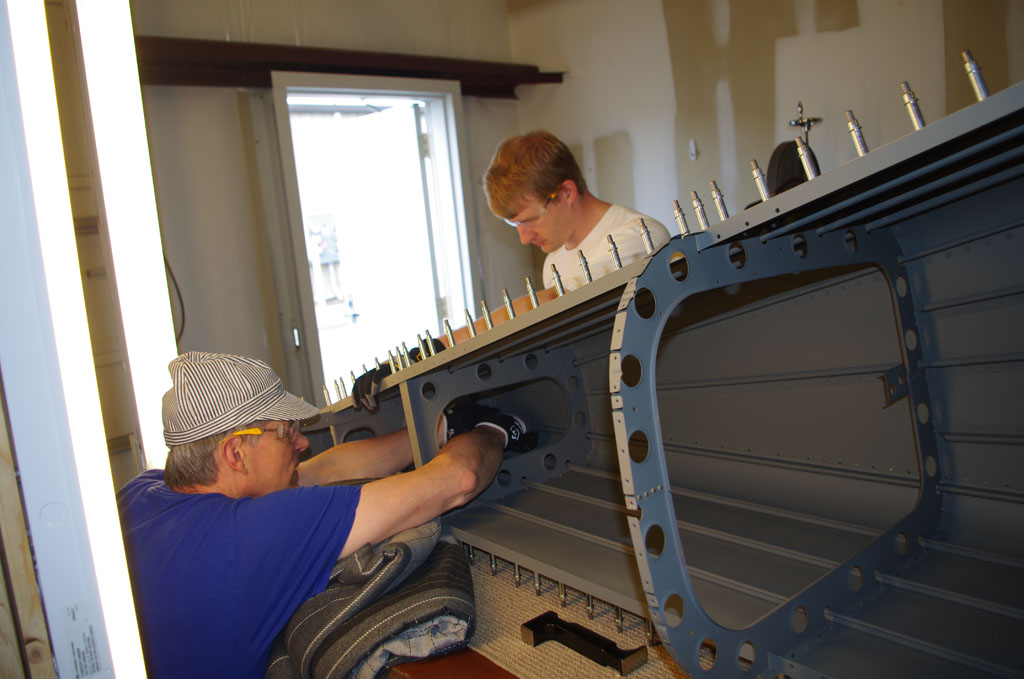
Here is another view of the cramped space available in the last two sections.


IMGP5361
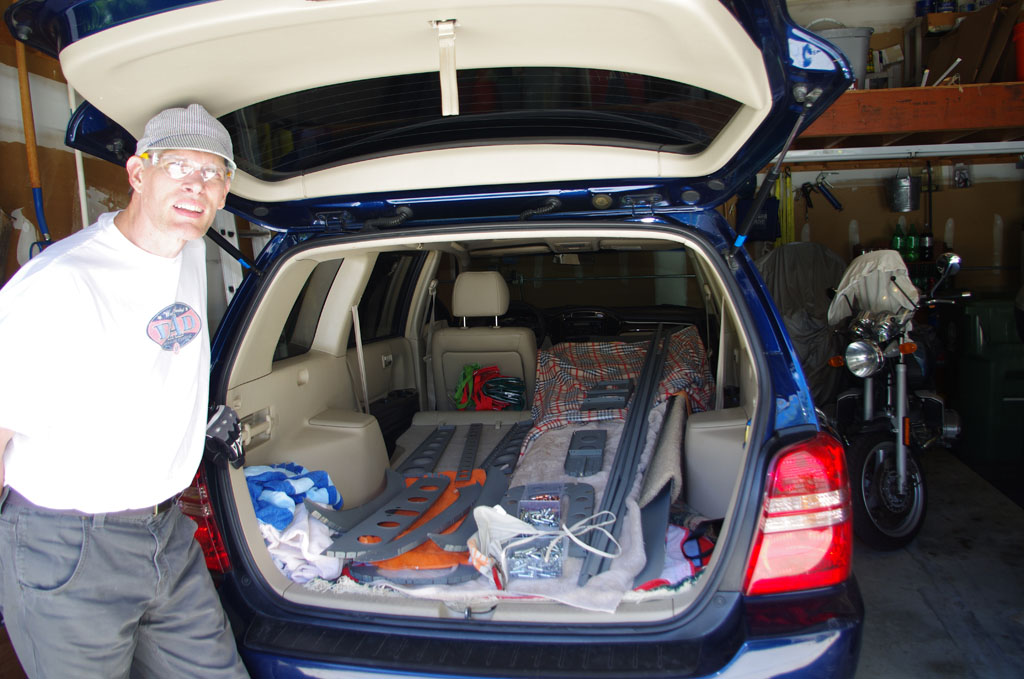
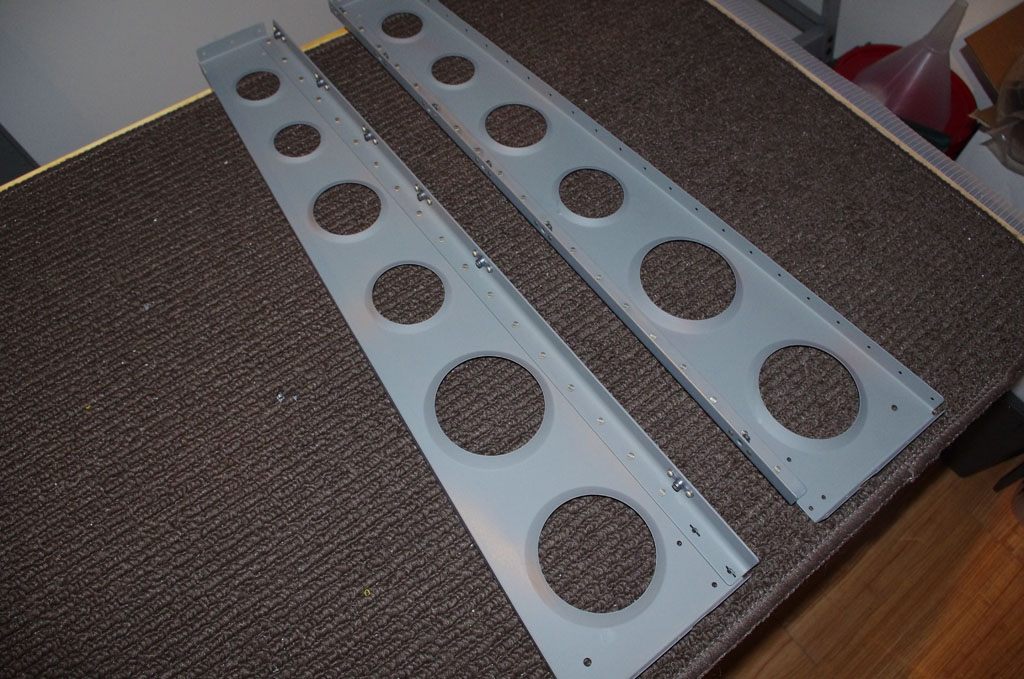
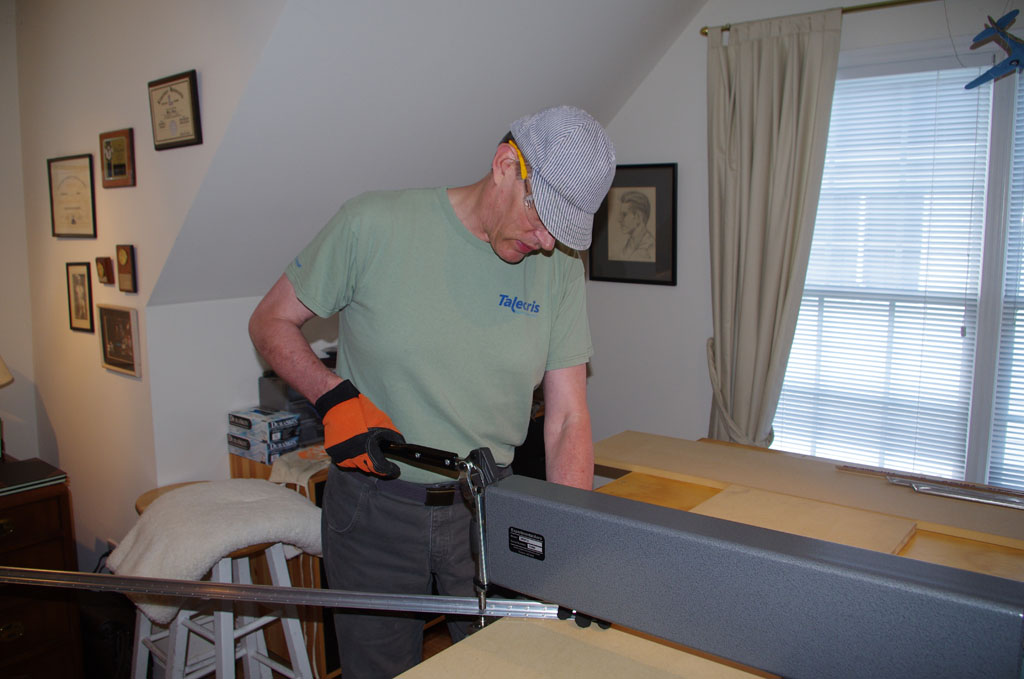
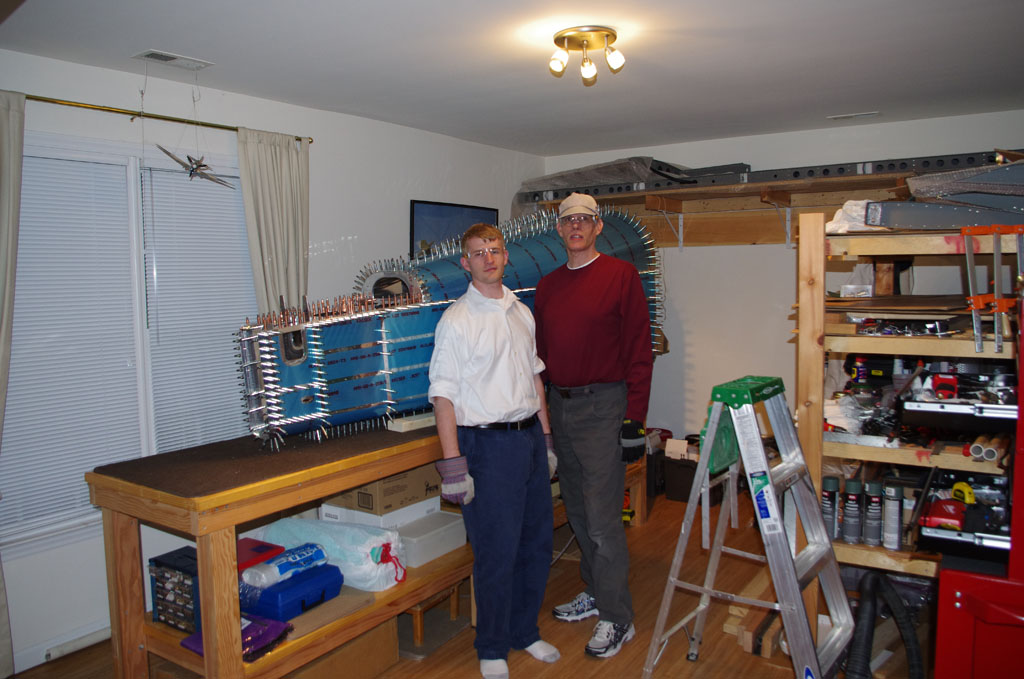
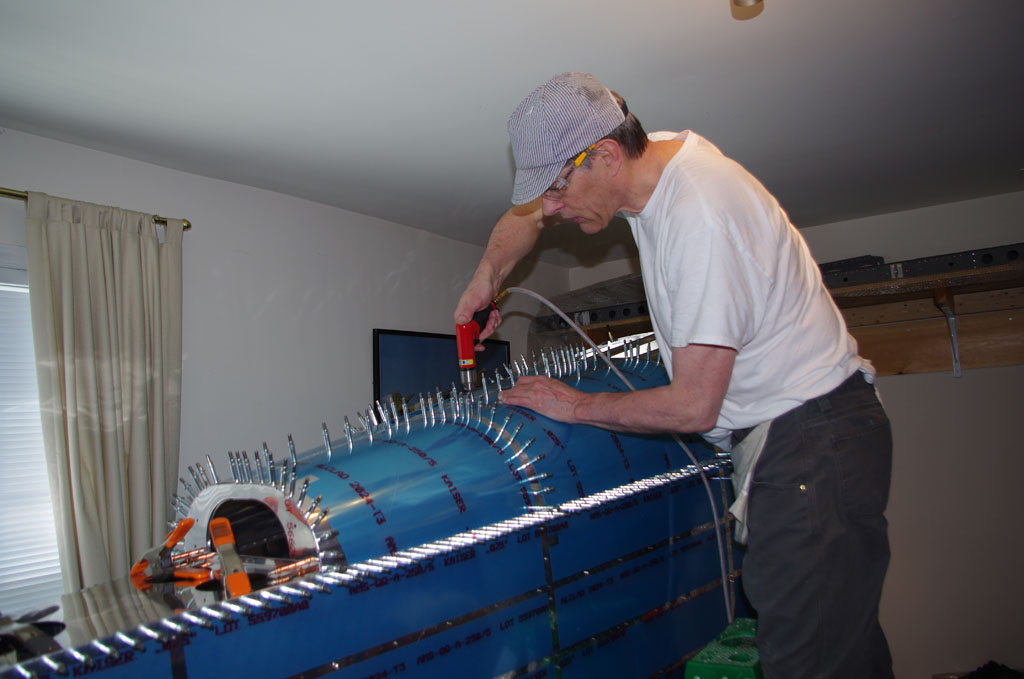
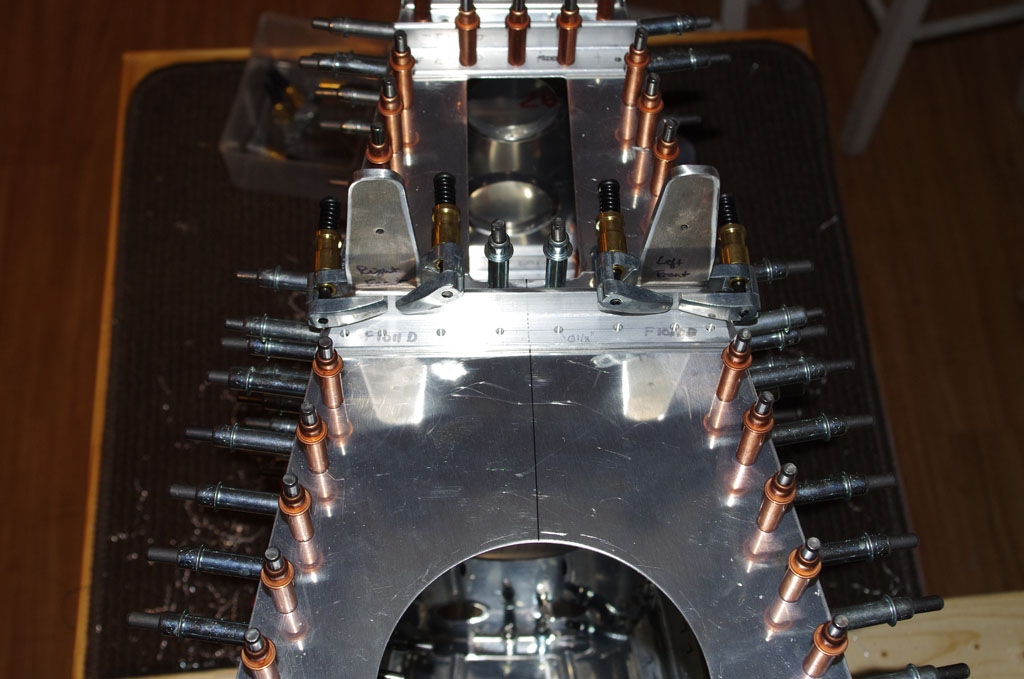
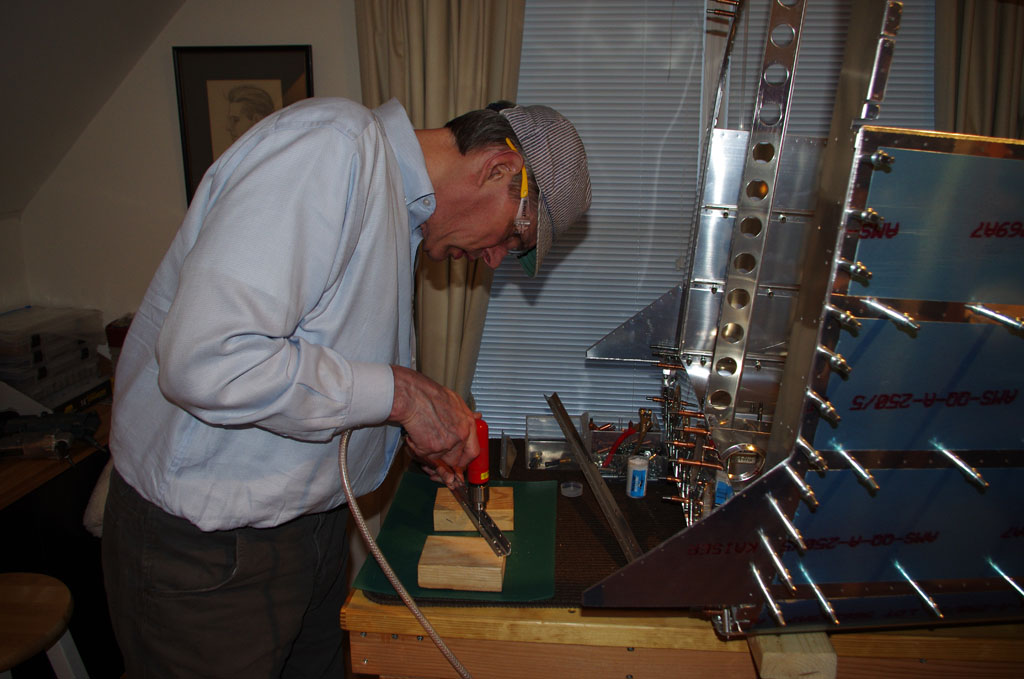
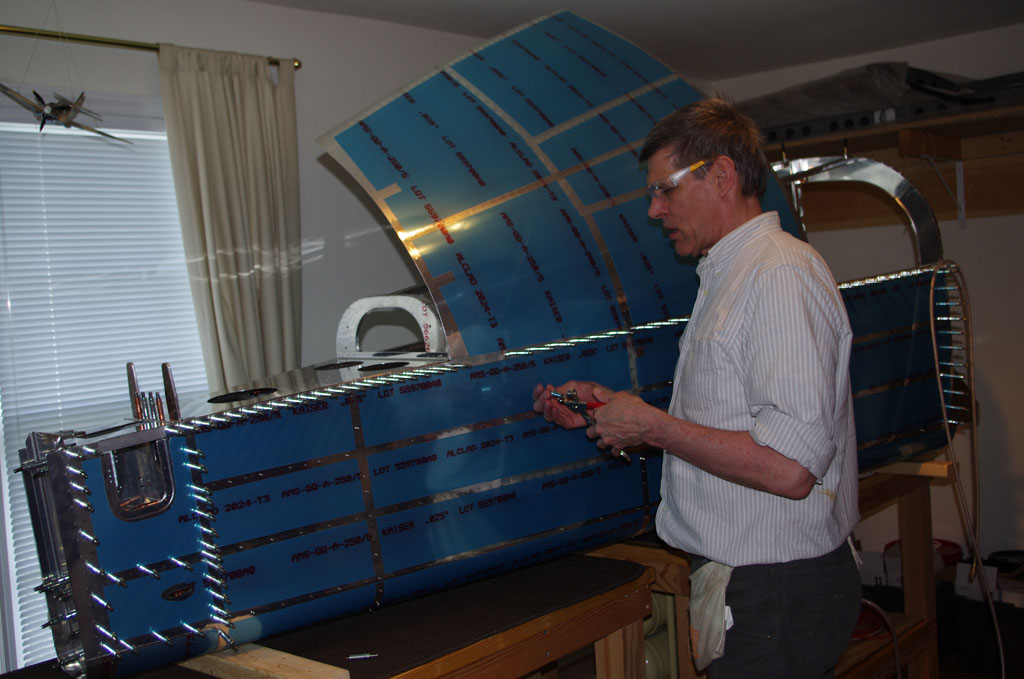
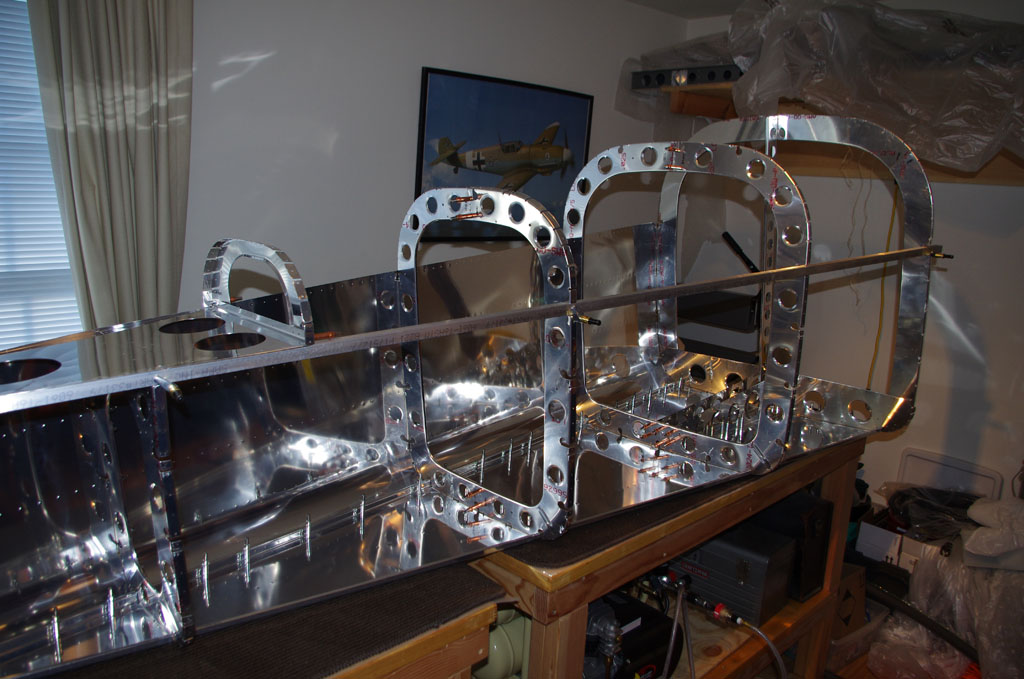
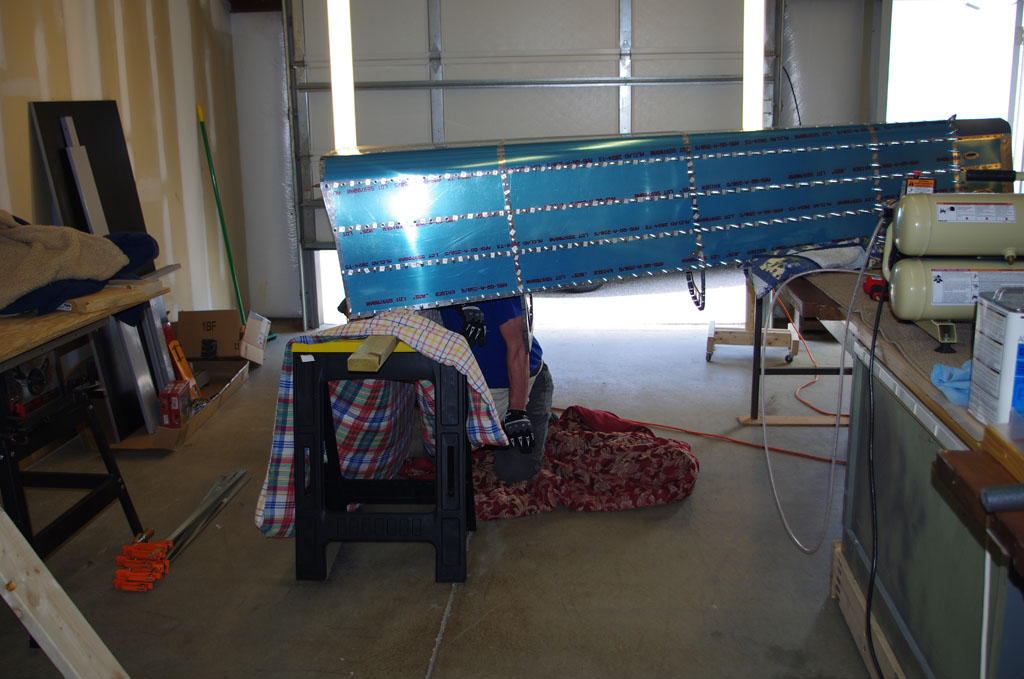
Because the J-channel stiffeners point upward when the tailcone section rests on the pan, the rivet heads are not visible when bucking.  My solution – turn the tailcone upside-down, then buck the stiffeners and frames from below.  In this shot the tail rests on the regular workbench, the front section on a 2×4 laid between two sawhorses and covered by a spare bed comforter. Not bad, and the visibility is good.


IMGP5363
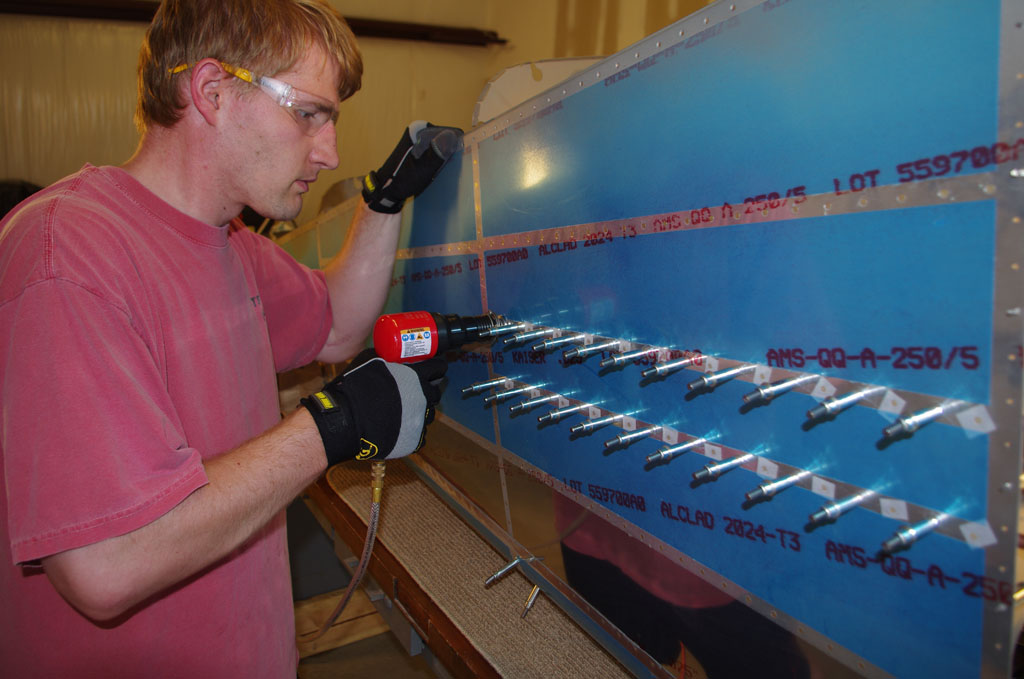
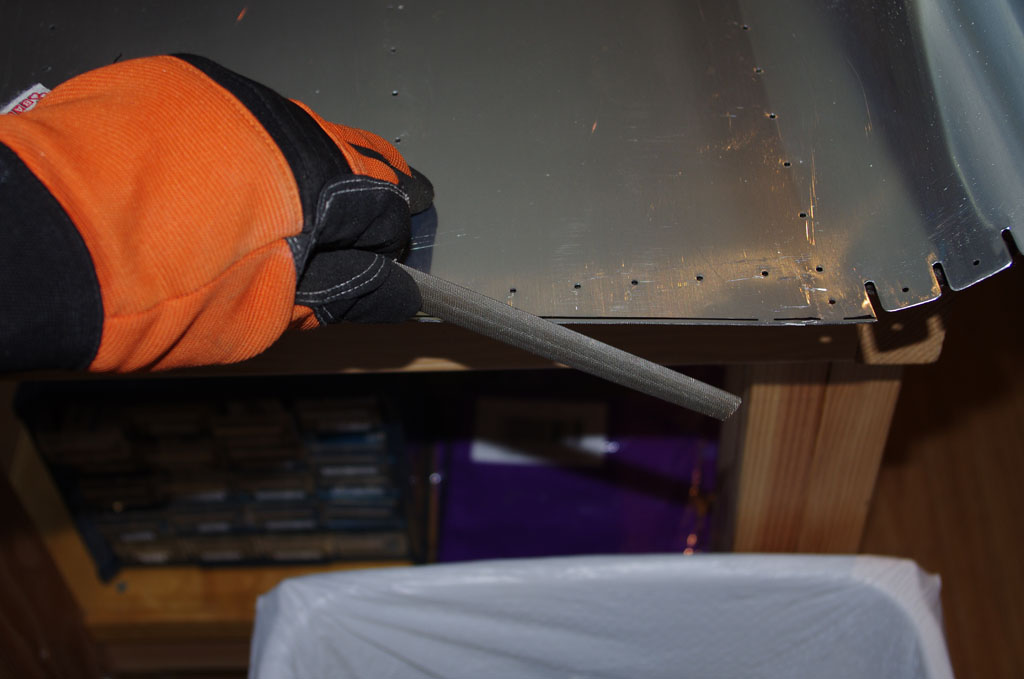
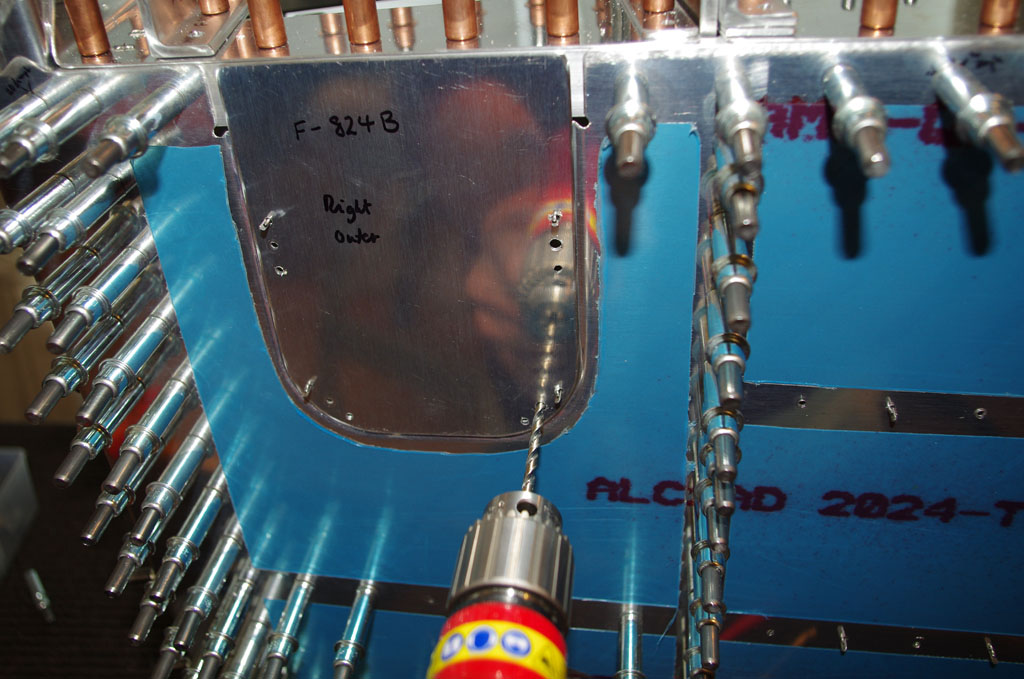
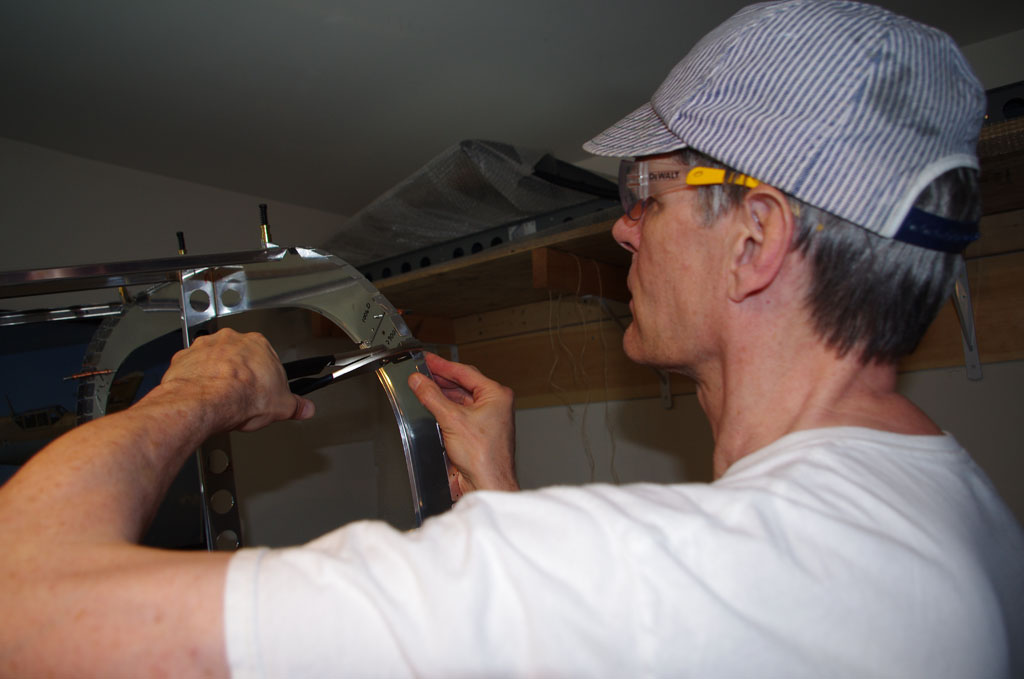
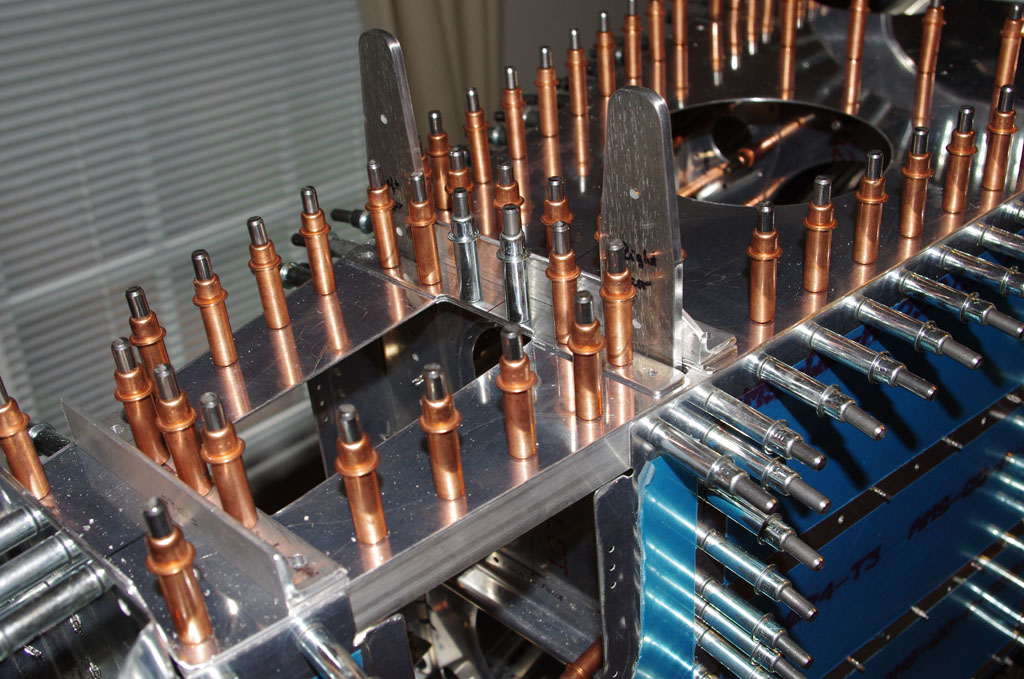
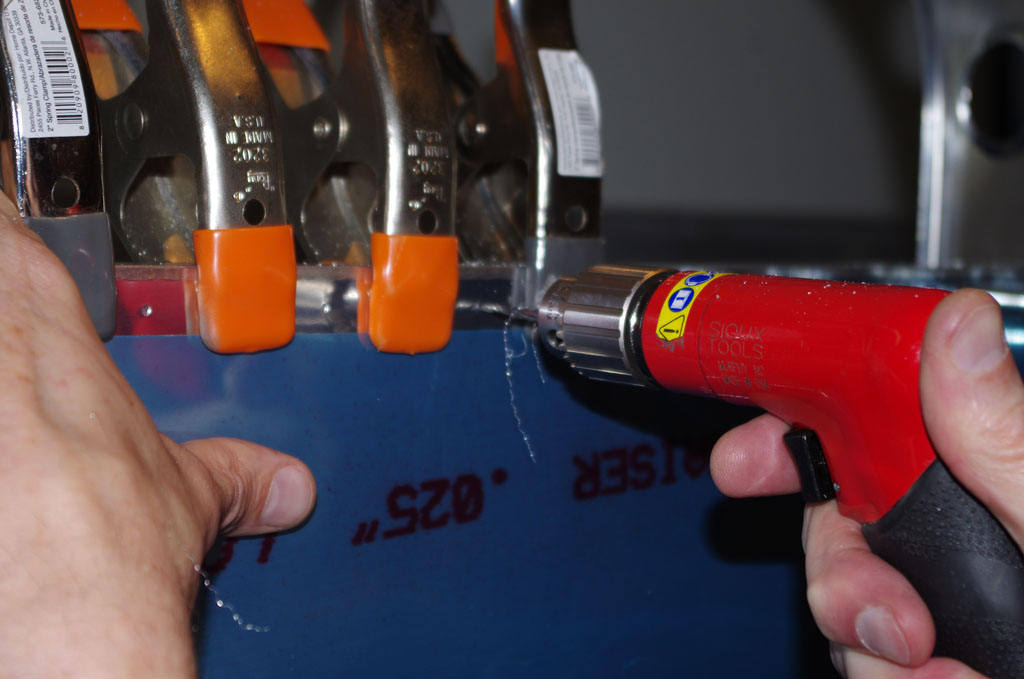
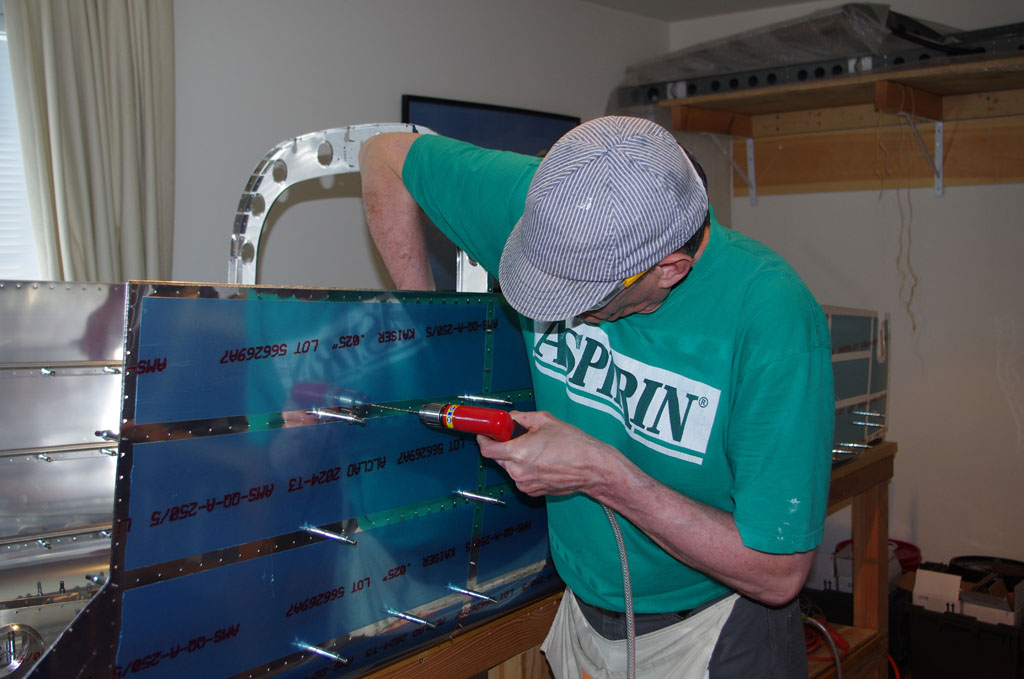
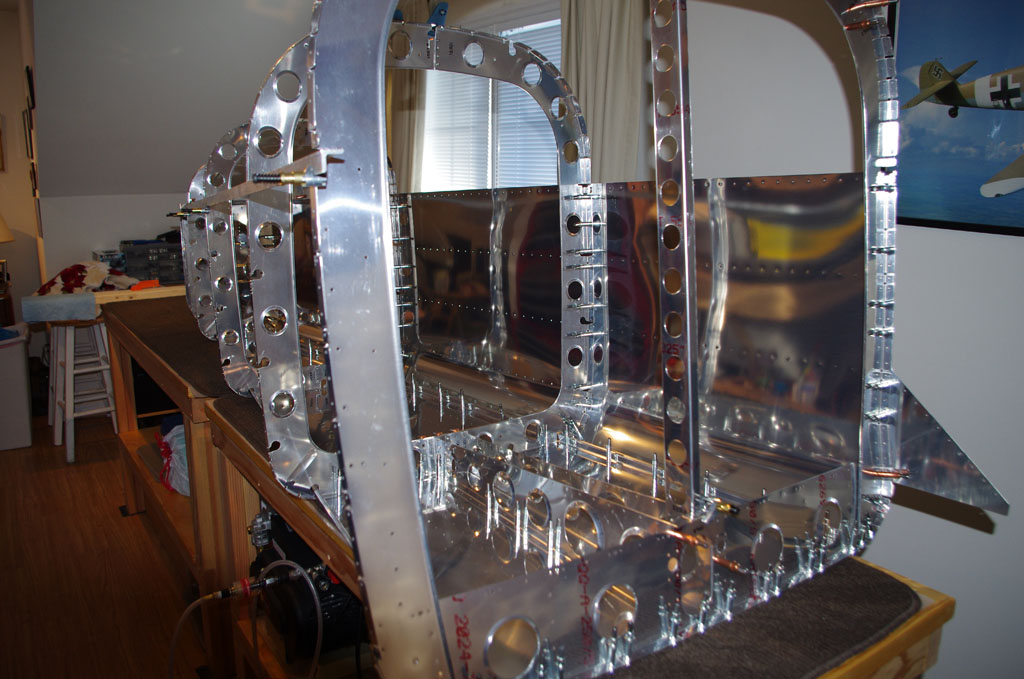
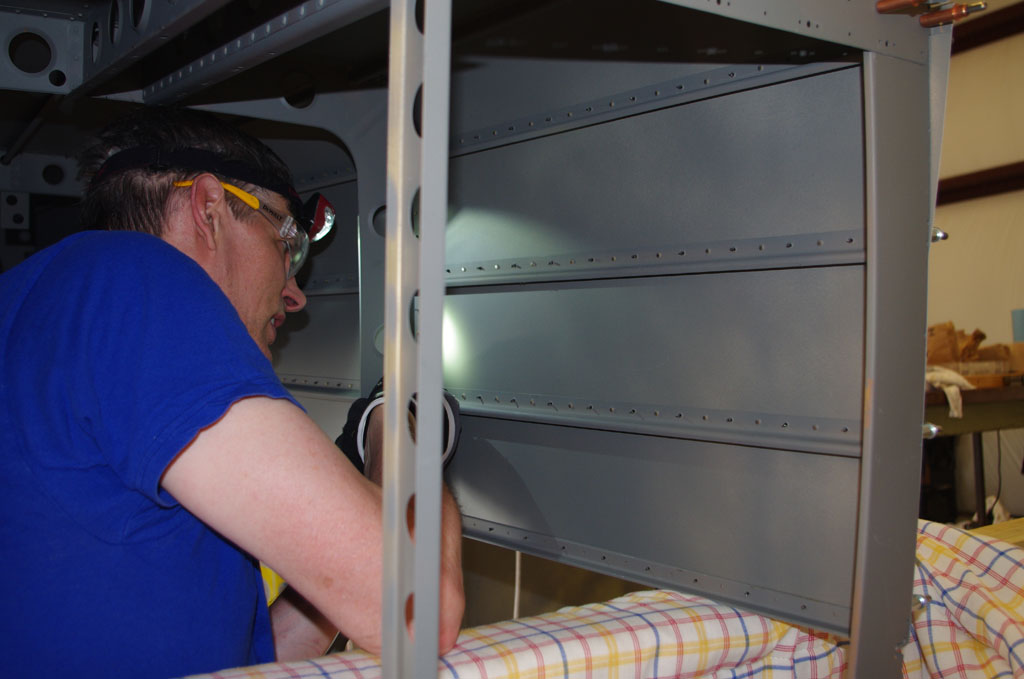
See, even from this angle the rivet heads over the J-channels are clearly visible.


IMGP5365
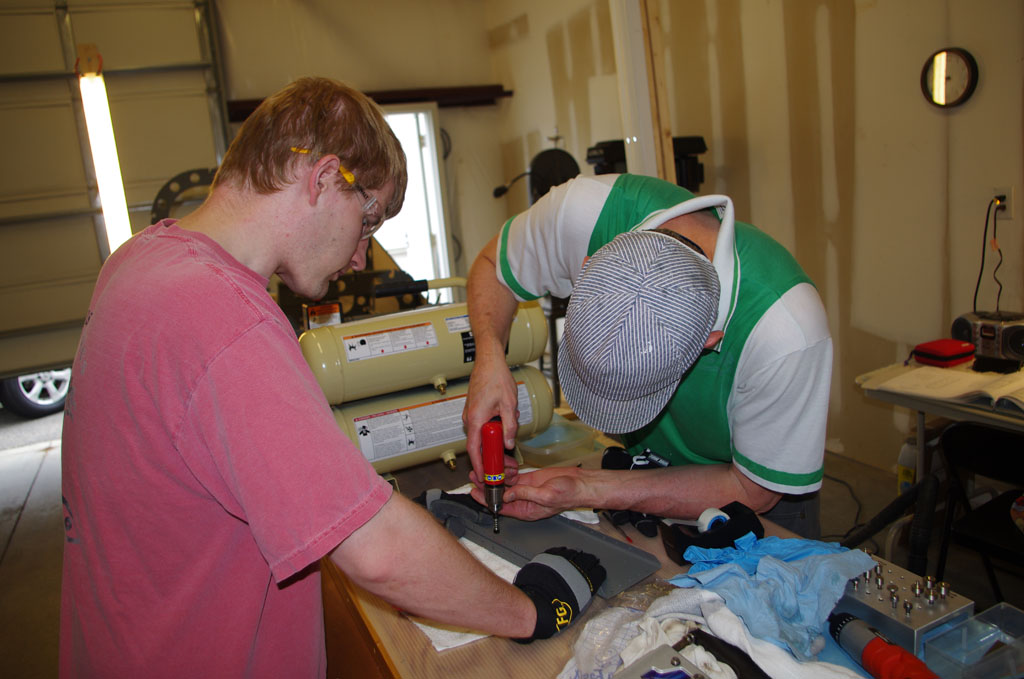
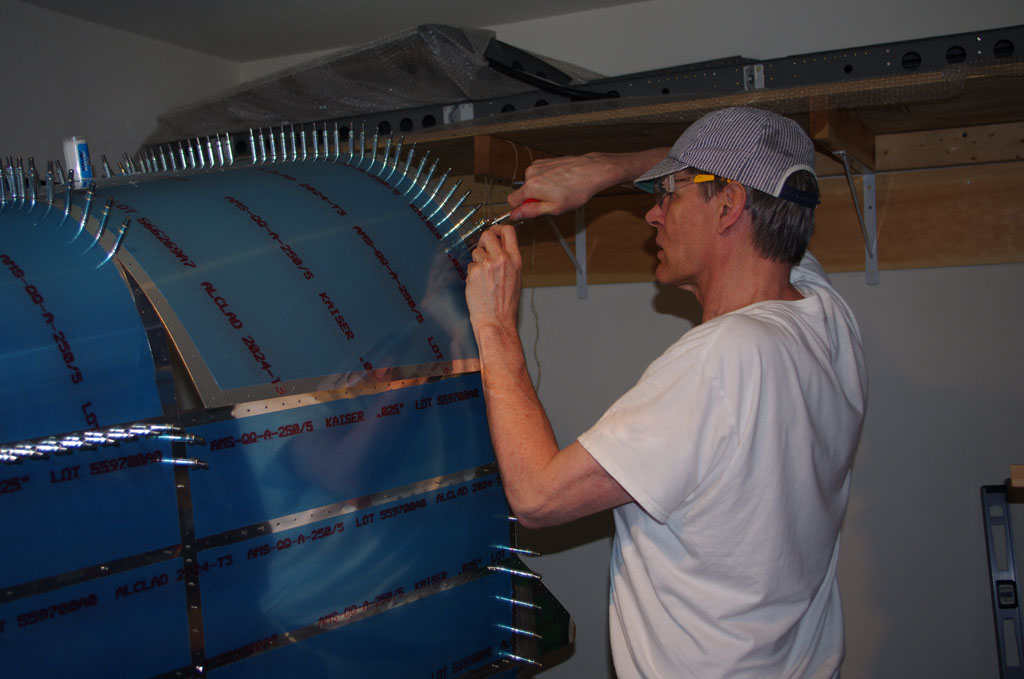
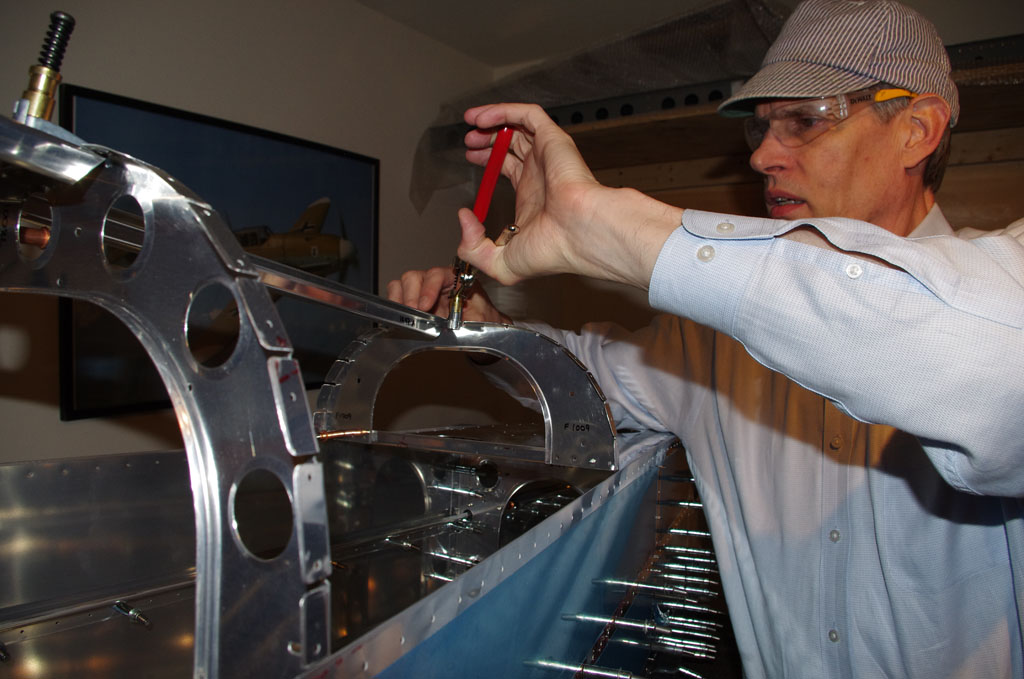
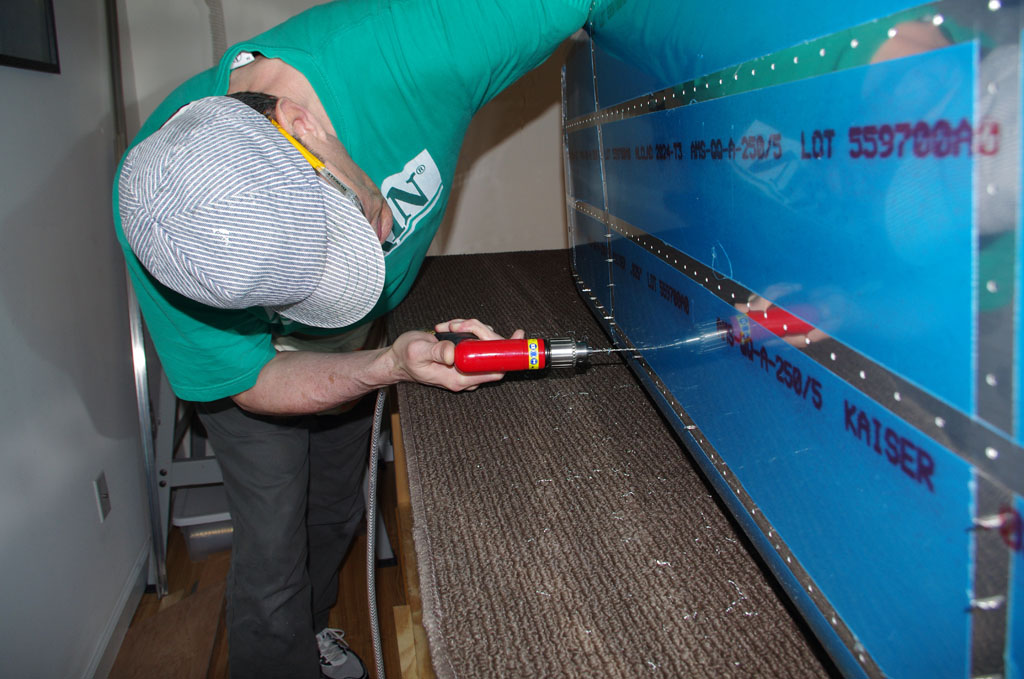
This view shows the extent I can reach from inside the overturned tail section.  This approach reduces blind riveting to about 10-15 rivets on the next to last section. The results were excellent!  Eric is really getting quite accomplished with driving the rivets and our teamwork is very good. Two drillouts during the whole exercise, and even these turned out good.


IMGP5367
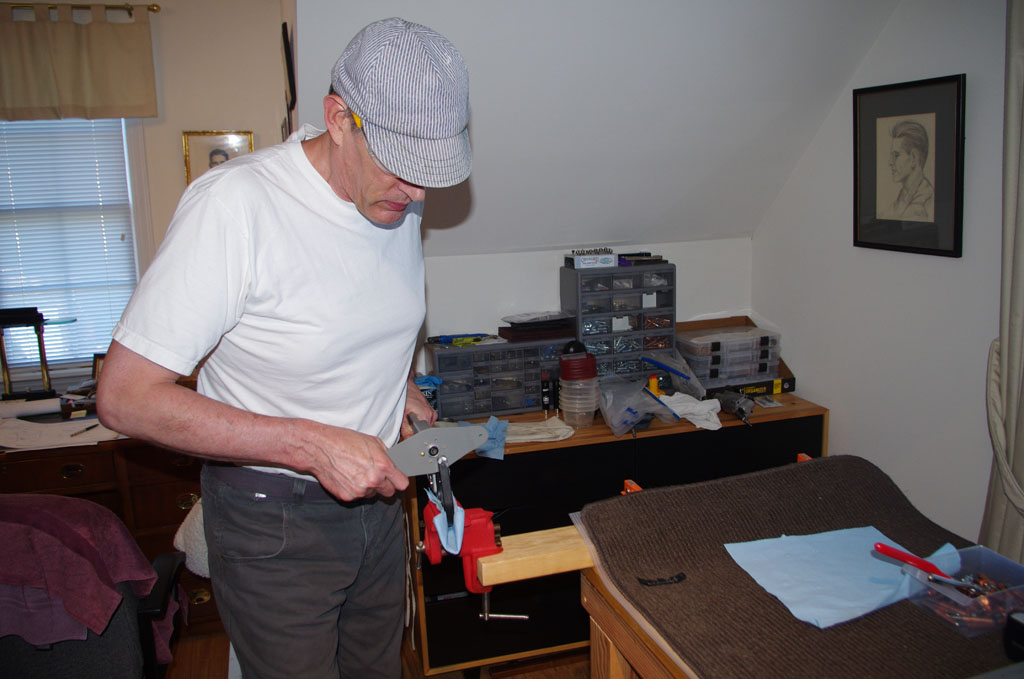
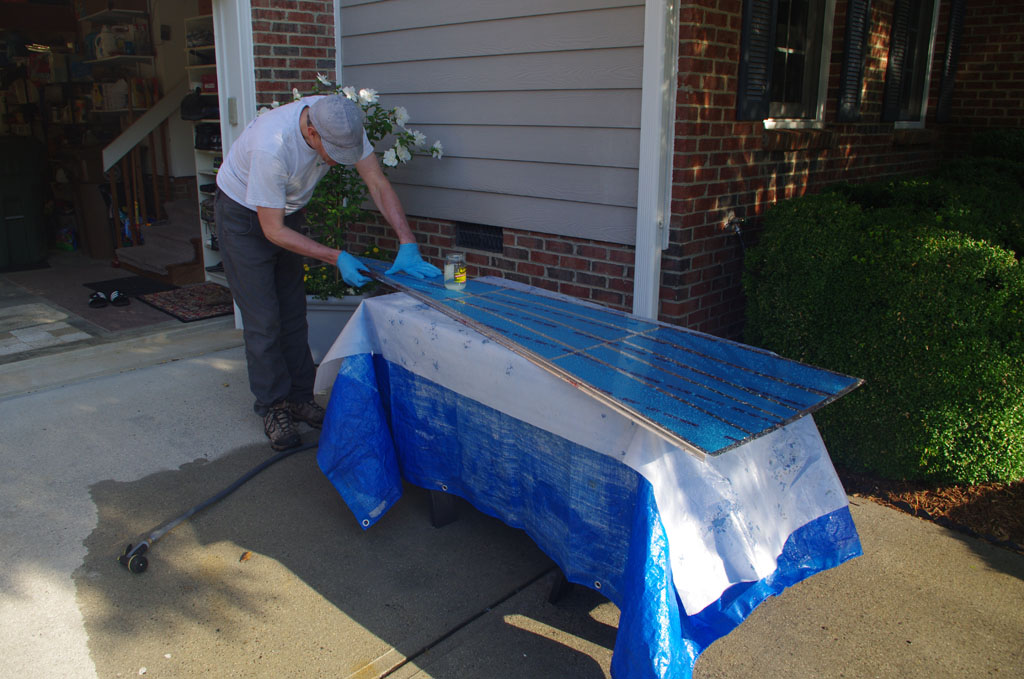
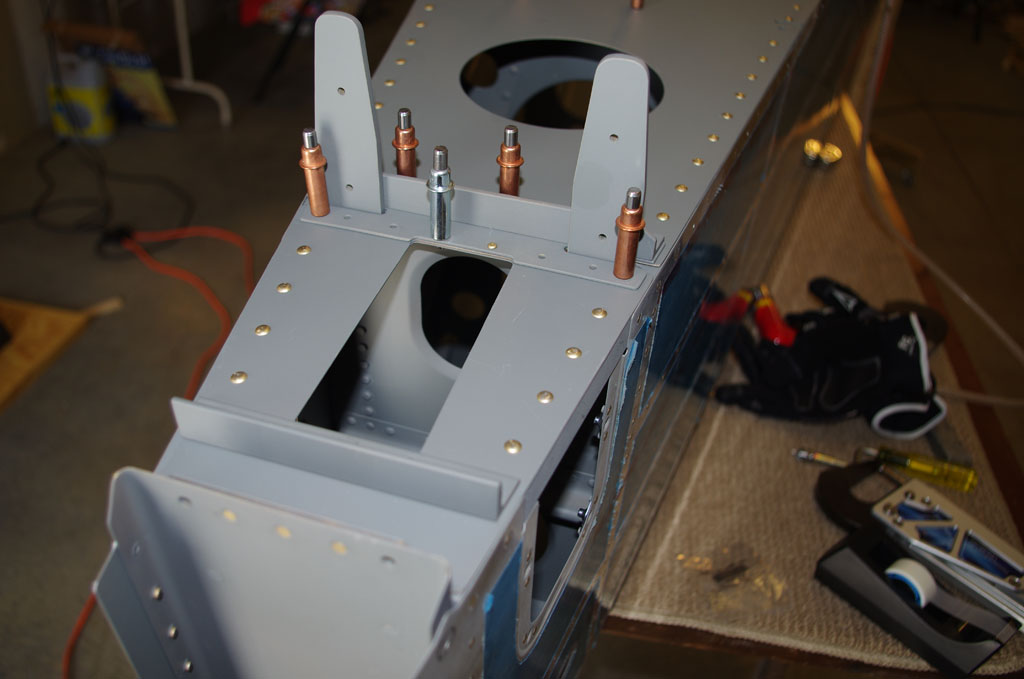
Attaching the aft deck rivets used a combination of squeezing those reachable with my 3.5″ yoke, and bucking the rest.


IMGP5369      So far so good.

Tailcone Assembly (2)

The 4th of July weekend marked a milestone in the plane build. Final assembly of the tailcone signaled moving the primary shop from the bonus room to the rented garage space.  The combined parts are now just to big to get out of the bonus room.  So except for small parts prep, the main work will be in the new shop.  I will miss the convenience and climate controlled comfort of the bonus room, but this move is a good indicator that progress on the build is steadily moving forward.

I also got word this week from Van’s that the quickbuild wing and fuselage parts will be delivered in two weeks.  The logistics are near perfect, as I anticipate being finished with the tailcone about that same time.


IMGP5320Moving day.  Fortunately the roughly 9′ longerons and skins fit just perfectly in Rita’s Highlander with the front seat down. The new shop is only about a mile from the house, but still layers of blankets were used to prevent banging and chipping on the short trip.


IMGP5323Here the bottom pan and left skin are clecoed together ready for riveting.


IMGP5328(Friday, July 3) Sometimes things don’t go just right, despite reading the plans 2-3 times before executing a step. Here we are drilling out a misaligned rudder stop brace for repair.


IMGP5340IMGP5334These parts really require two people to process.  While a one-man rivet job attaching the skins may theoretically be possible, I cannot imagine the outcome. Here Eric is driving and I am bucking the bottom pan to the bellcrank housing ribs. We completed all the bottom pan rivets for the left side in about 5 hours in the 90 degree heat of the shop.  Even with fans going full blast, the heat and humidity were oppressive.


IMGP5345IMGP5348(Saturday, July 4) Rich came over to drive rivets for the left side skins, stiffeners, and frames. Again a two man job, but the results were very good.  We started early in the morning to avoid the heat later in the day.


IMGP5351This picture shows the rearmost section with the rudder stop brace on the left.  Nice outcome for the repair.  I may go back before attaching the right skin to re-prime the scuffed areas and paint the rivet heads.  This treatment is really not necessary, but once enclosed, this section will be completly inaccessible.  Might as well do it now to avoid concerns about any possible future corrosion.


Tailcone Assembly (1)

Weeknights I started on assembling the smaller parts (brackets, angles, frames, bulkheads). On the weekend Eric came over to start riveting stiffeners on the bottom tailcone pan.  This action will be the last in the bonus room for the tailcone, as final assembly will have to take place in the shop – assembled parts are simply to large to get out the door and out of the house.

IMGP5291IMGP5312Here riveting the Bellcrank Assembly together, and the final result.


IMGP5316For the rearmost frames and bulkheads I used some spare mixed primer to cover the rivet heads. I had not done this with all parts prior, but found the DP40LF primer will hold for some days if sealed properly in the mixing cups.  Maybe if I have some extra material after future priming sessions, I will go back to the VS, HS, and rudder parts to cover the still accessible rivet heads.


IMGP5308IMGP5318Here the angles are riveted to the Bellcrank Assembly brackets, then the final results.


IMGP5310IMGP5311Bottom pan stiffeners being bucked into place – I buck while Eric drives. He has gotten quite good at this and the results are excellent.  We started the pan trying to back rivet, but had to drill out the first four attempts.  We found bucking the rivets to produce better results, and actual was faster.

Tailcone Prep (Alodine/Prime)

After vacation in Germany, I spent the next few weekends preparing the tailcone parts for assembly.  As usual this involves dimpling, washing, scuffing, brightening, alodining and priming parts. Because of the variety of shapes and sizes of tailcone elements, multiple batches over different weekends were needed.  This is tedious, hot work, especially when temperatures outside are near 100 degrees! However, the outcome is worth the effort.

IMGP5248Oddly the right side skin needs to have a triangular shaped piece removed, while the left side stays intact.  I am not sure the reason, as the plans for joining the tailcone to the forward fuselage section will only come when the quickbuild kit arrives.


IMGP5245IMGP5255Some parts needed to be countersunk prior to prepping.


IMGP5257IMGP5260Others are dimpled beforehand.


IMGP5262Washing and scuffing …


IMGP5265IMGP5267Brightening …


IMGP5271IMGP5276Alodine the small parts …


IMGP5278The product of one weekend’s work.


IMGP5283IMGP5286Brightened stiffeners and longerons go in the long tank, come out alodined.


IMGP5288The product of another weekend’s work.


IMGP5290Here the stiffeners, longerons, and small parts are ready for assembly.  One more weekend is needed to prime all the skins.


IMGP5295IMGP5297Mid-June and this is the third straight weekend prepping tailcone parts.  Unlike alodine treatment for the small parts, I use Pre-Kote to treat the large skin surfaces while scuffing. After drying, they are ready for a primer application within 24 hours.  I used lint-free shop cloths and Rita’s hair dryer to make sure no moisture remained on the surface.


IMGP5305IMGP5300After hanging in the shed I also wiped the surfaces with PPG 303 Degreaser for good measure.  Finally two thin coats of DP40LF were applied.

Tailcone Fitting – Part 2b

All the fitting and match drilling of skins and external parts has been completed.  Now for deconstructing in preparation for corrosion protection and priming.

IMGP5189Eric and I drilled out the final frame holes on the aft-most frames.  This completed the match drilling process.


IMGP5190IMGP5193After removing the upper skins, the plans call for fitting and drilling the shoulder harness attachment brackets to the longerons.  The left photos shows the bracket measured and clamped into place.  The right photo has the #12 holes drilled out.


IMGP5191Access panels are then fitted and drilled for nut  plates.


IMGP5194Strange, but the right side triangular tab needs to be removed before riveting the skin to the tailcone.  Here the cut-line is drawn with a straightedge between the baggage bulkhead tabs and the flat face.


IMGP5195Eventually I would like a fresh air supply to an aftermarket overhead console (probably will be from AeroSport Products).  I purchased the NACA ducts for $6.50 each from Van’s, by far the cheapest source for this ducts.  Aircraft Spruce only had carbon fiber units for $100! Ouch.  This photo is a mock-up template on construction paper.  After our vacation trip to Germany, I will be measuring for the hole location, then cutting the skins to match.

Tailcone Fitting – Part 2a

After a week on business travel, I returned to finish fitting the skins, stiffeners, longerons, aft deck, and doublers.

IMGP5172Here drilling the aft top skin to the stiffeners.


IMGP5171Fluting the frames is required to get a smooth curve on the skins.


IMGP5175IMGP5176Walking the forward top skin to the frames.  This time I started at the top and moved downward.


IMGP5177Rita says it looks like a porcupine. I think it looks great.


IMGP5178Fully enclosed tail section!


IMGP5180Next day I drilled and clecoed all the aft deck parts.


IMGP5181IMGP5184The horizontal stabilizer attachment points are reinforced with 3-4 extra pieces of fabricated aluminum.  This photo from above shows the alignments along the center line.


IMGP5188Close-up of the clamped, then final attachment brackets.


IMGP5185Here is the aft deck fully drilled and clecoed.


Tailcone Fitting – Part 2

This week was about making and fitting the two longerons, plus continuing the alignment of skins.

IMGP5153First two 98 1/8″ longerons must be cut to length, and drilled properly from a long piece of AA125-3/4×3/4 angle aluminum. This is the easy part.  The real pucker factor is placing in a vise, then hitting the pre-stressed piece with a rubber hammer until a 2degree bend is achieved. Any over-hit means the piece will be stressed wrong. Because the bend mates to the aft deck precisely where the horizontal stabilizer attaches to the tailcone, getting it right is essential.  Despite my concerns, the bends turned out according to plans. (sorry no picture of the process).


IMGP5145Prepping a few additional parts is needed before actually fitting the longerons to the tailcone shell.


IMGP5161IMGP5160Longerons are fitted, aligned and match drilled to 3/32″.  After all the skins are attached, these same holes will later be drilled out with a #40 bit and countersunk. Getting the holes perpendicular to the skin surface is very important to prevent ’round over’ of the rivets at a later stage.


IMGP5157 This close-up shows the left side longeron drilled and clecoed into position. The two pieces sticking straight up through the aft deck are the main attachment points for the horizontal stabilizer.


IMGP5151Here the rear frame is clecoed to the aft deck, and the middle stiffener is clamped into place.


IMGP5166The upper aft skin comes from the factory as a flat piece. The plans indicate clecoe one side and walk towards the other side bending and applying clecoes along the way. The idea is provide a gradual stress application and final bend to the skin metal.


IMGP5168The upper aft skin is fully fitted into place.  I thought the tail was rigid before, but WOW – after the longerons and upper skins are installed the whole unit is rock solid. This inspires a great deal more confidence about the overall strength of the tail section.

Tailcone Fitting – Part 1

After months of working on shop/logistics and dealing with some health problems, I finally got back to working on real plane parts.

IMGP5130IMGP5138Lining up the stiffeners, bulkheads and skins can be an interesting proposition by yourself.  Fortunately Rita and Peter were available to help on the most demanding sections.


IMGP5135IMGP5137The plans call for hanging the pieces from sawhorses, but I found placing the pan on the workbenches covered by carpet with clecoes from the inside to be a more comfortable arrangement.  Here clecoes are being applied after #40 match drilling the stiffeners and bulkheads.


IMGP5139IMGP5140A few shot from inside looking backwards from where the rear seat would be.  It is amazing how each of these fragile parts when fastened together properly can be so strong. With the stiffeners in place, the whole assembly is quite rigid.


IMGP5142IMGP5144The left picture shows where the rudder stop bracket is attached inside the final tailcone section.  The right shows the final bulkhead (where the tie-down bracket is on the lower inside).

Tail Cone Staging

The tailcone has the most parts of any section built so far. This means more filing, sanding, scotchbriting and preping before assembly.

IMGP4732The obligatory staging shot with vinyl removed.


IMGP4827Initial fitting.  This was about 30 hours after starting all the metal  prep on frames and bulk heads.  I have not even started on the skins or the miscellaneous other parts.


IMGP4830Section where bellcrank will be housed.


IMGP4832IMGP4833One lower skin is attached for stability. This is actually starting to look like an airplane!  Much more metal prep and fitting before any match drilling is started.